A Faux Finish….Faux the win.
We have a new completed project that we’ve been excited to share with you – our faux finish doors!
Every year we do a little spring cleaning because after all, a paint studio collects paint containers that seem to reproduce like rabbits while we sleep. Along with our spring cleaning, we like to reassess our studio and see what can be refreshed and refinished. We like to walk the talk around here, so adding new finishes and projects is the perfect way to show you more of what we do and what we teach.
Simple Finishing
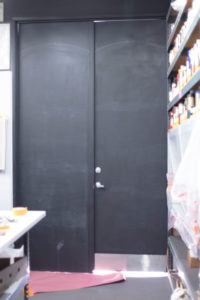 The latest faux finish project is our studio doors. These guys are massively tall and really did nothing for our space. Last year, we painted our drop ceiling black which helped everything in the studio pop, but the studio doors were oh so sad looking.
So, I’ve been stuck on reclaimed wood and wood finishes that mimic the look of rustic wood and still seem to be so popular and timeless. I decided to do the doors in a barn door style with a soft gray/beige finish to keep things neutral.
I’m the one who can’t stand a finish that has 14,000 layers on it. Why? Because when I work out in the field, I won’t make any money selling it. Secondly, I’ll get bored reeeeeeeally quick. Because of my short attention span. Blame it on the creative brain. That’s my story and I’m sticking to it.
The reason I bring up 14,000 layers is because this finish is nowhere near as complicated as that. I like simple and beautiful. I can sell that. I can profit from that. And if you are reading this and are in the decorative painting industry for a business that wants to create profit, then that’s the sweet spot. Do as many layers AS NEEDED for it to be beautiful and that you can walk away from with your desired profit for your efforts. There is really no service to this world for starving artists. Let’s change that.
So this is how I keep it simple and beautiful.
First, I sanded the doors and the frame with 220 grit sandpaper and dusted and cleaned really well with Krud Kutter and denatured alcohol. Dust, grease, and debris are your enemies to a good finish. Get it as clean as possible.
I started with SetCoat® because that’s what I do on every job. SetCoat® is like the faithful Labrador (or insert favorite dog breed) that is always there for you and does what you tell it. Like, stay put on the surface and don’t chip, peel, or run. Good boy. I mean paint.
If you are new to SetCoat®, check out how we re-coated our studio floors with the stuff. It’s an excellent product for every project on walls, floors, or furniture.
I mixed a custom gray color of SetCoat® here as the base. I brushed on one coat. If you need full coverage, you can apply 2 coats, but since I’ll be doing another layer, that’s not crucial here. Also, we had SetCoat® on the doors to begin with. Let this layer dry well, preferably overnight.
The next thing I had to do was measure out how I wanted the wood planks to lay out.
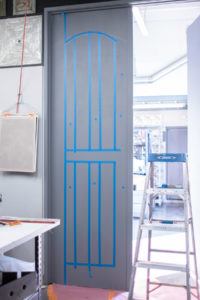
Once I measured out each section and taped them out, I brushed on Master Finishing Medium™ which is a very versatile product for filling wood grain texture or in this case—creating wood texture. It has medium body for a light build of texture that is fluid and not chunky.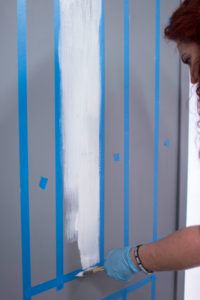
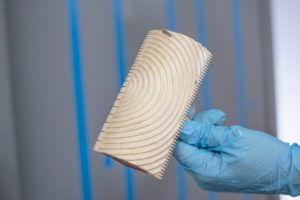
After brushing, I used a rocker graining tool and pulled it over the wet product. The nice thing about this process is that if you don’t like the outcome after pulling the rocker tool, you can easily brush it again and re-do it while it’s wet. Having this finish in individual sections like you see makes it easier as well.
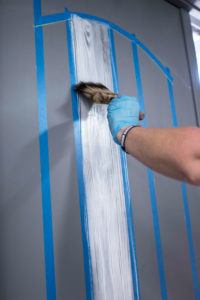
The trick to this faux finish having the rustic effect is using a badger brush to create small peaks and pits to simulate rough barn wood. This must be done while the product is wet. Be sure to keep the tips of the badger brush clean by using a dry terry towel, otherwise, the bristles will collect too much product and it won’t be soft anymore.
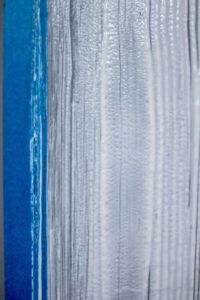
After I did all the sections, I switched the tape around and did the same process until the entire door was covered with this texture.
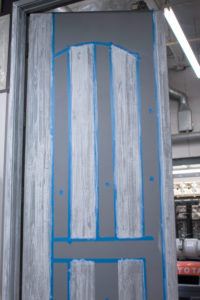
After that, I applied another coat of this custom gray SetCoat® mix.
Highlights
To highlight the texture of the surface, I used Pickling White Stain & Seal™ and offloaded my brush until it was very dry. Just a hint of the product on there. 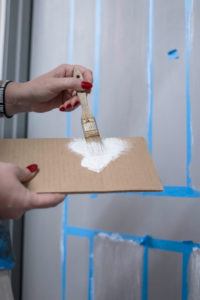
I gently brushed with the side of the brush—not the tips—to have more control of coverage. I swept the brush over each section.
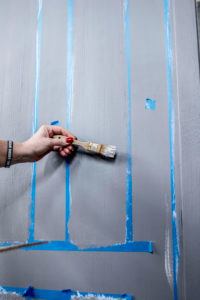
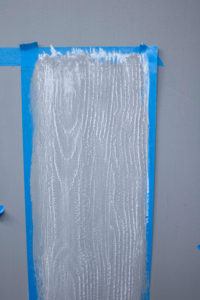
For the sake of time, I did all the steps on each section including the final glaze. After the glaze dried, I switched the tape and did the opposing sections until it was entirely covered. This saved time and tape.
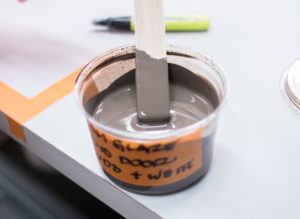
For the final glaze, I created a custom mix using AquaCrème™ and FauxCrème Colors™ in Van Dyke Brown, Trans Oxide Asphaltum, and White. I brushed on a coat with random strokes—some heavy some light.
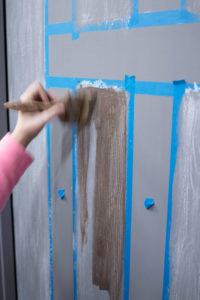
Then, I whipped it with a flogging brush. This is a great technique when you have some aggression to clear. Ask me how I know. This will help to even out application marks as well as add to the wood grain effect.
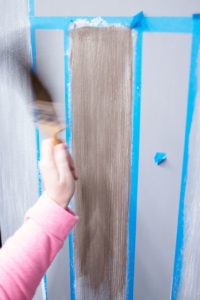
Pull the tape, repeat these steps until 100% of the surface is covered and then topcoat. We used C-500 Urethane in Satin thinned with about 10% water and brushed it on with a soft nylon brush.
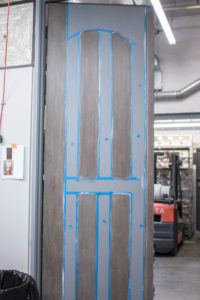
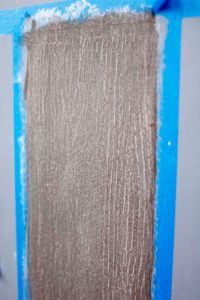
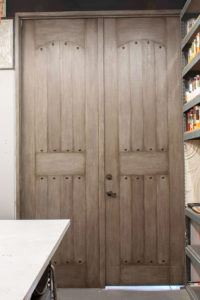
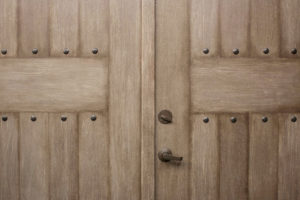
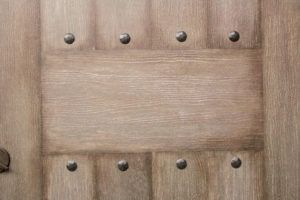
What do you think of our studio’s new faux finish doors? What would you do this finish on? Share your ideas with us!

Beautiful work, great choice for your studio doors!
Love this! Very “old world” :-)Best part is it’s simple!
This is exactly how I picture my garage door. I’ve seen them in brown wood. But never in grey wood. Dou offer a class or workshop that covers that kind of project? If so please send me info. Great job and I’ll b looking forward to a response. Have a great day!
Hi there, Cisco!
Thanks so much for the kind comment on our blog! We definitely teach this finish. Where are you located? Are you close to southern CA? We would love to share it with you. Call us at 888.977.FAUX or email us at [email protected] for details.
I have a wooden door that leads to the workshop in my garage that I really need to work on. Right now it is just a plain old wooden door with nothing special about it. I really like what you did to your door by adding wood grain and rivets to add ascents to the door. The after picture looks much more interesting than the before picture.